Solution Graphics

Foodbuzz
Ask an Expert - Visit my Virtual Office at LivePerson
Showing posts with label tutorial. Show all posts
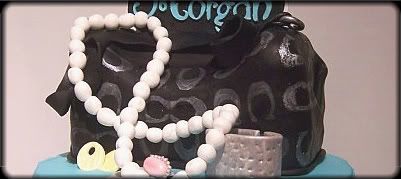
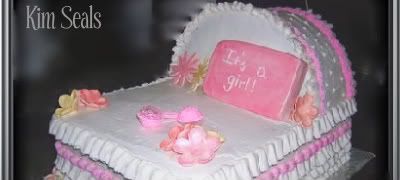
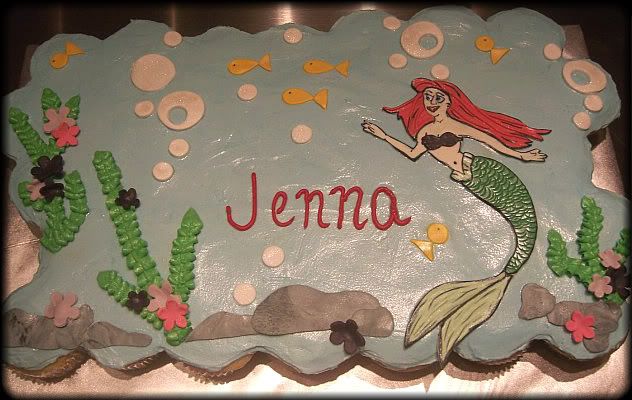
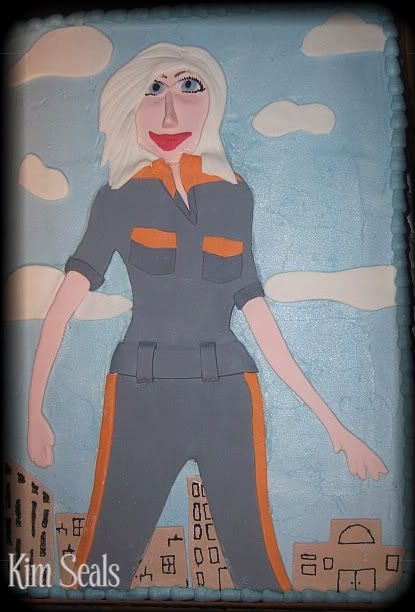
These images are a lot easier than they look and will give your cakes that wow factor you're looking for.  Before we get into the tutorial, here are a couple examples of how they can be used on a cake.


Now, down to business...

Supplies

Printed image
fondant or gumpaste (colored accordingly)
Exact-O knife
Scissors
Wax paper
Flat Surface like cardboard or a cookie sheet
Clay Extruder (optional)
Gumpaste tool (anything with a smooth edge) or the back of a small paint brush
Black and blue edible ink OR thin edible markers
Thin brush (if using edible ink)


Directions

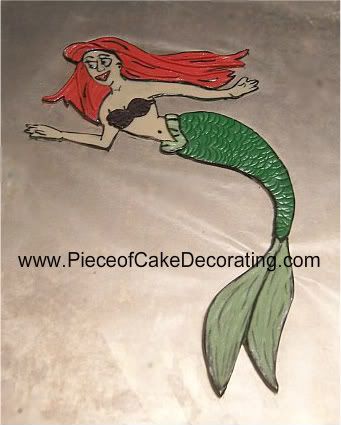
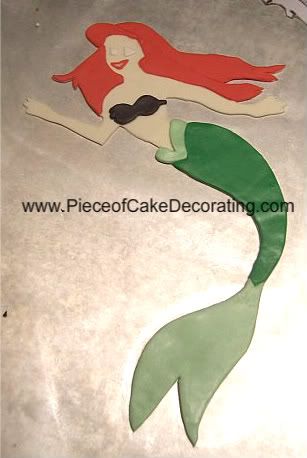
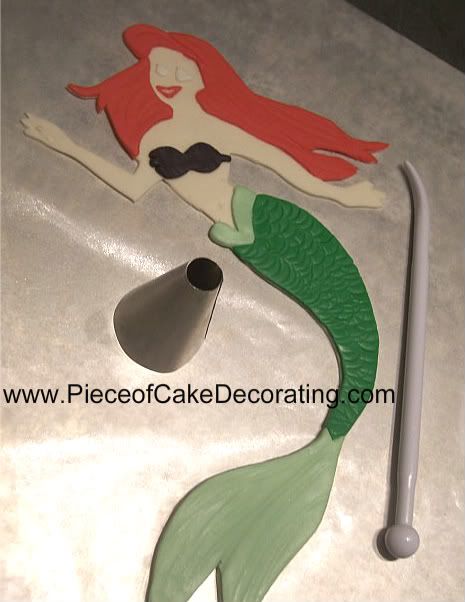
Throughout this tutorial I will be using the Ariel image at the very top.  Keep in mind that we will be working in layers.  The very bottom layer for my image will be skin toned and we will build on top of this.

Important:  These images should be done a few days in advance to allow it to dry.

Step 1
 

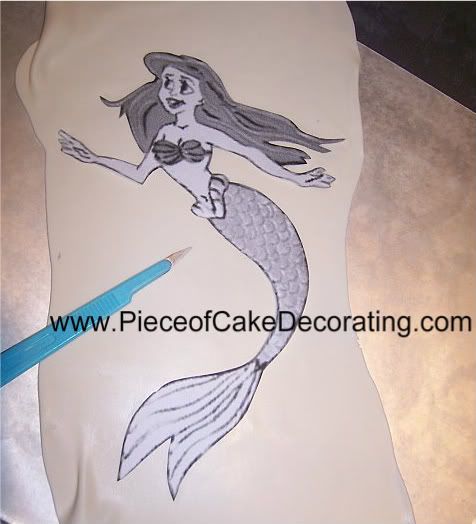
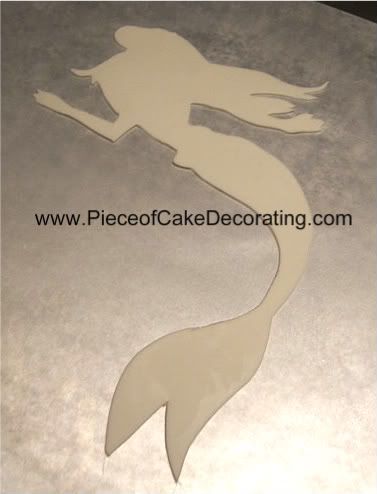
Roll out a piece of fondant (skin tone) about 1/8 of an inch thick and place it on top of a piece of wax paper on your cardboard or cookie sheet.  Then place your cut out printed image on top and, using your Exact-O knife, cut your full image out.  Your end result will look like the picture below.


Step 2


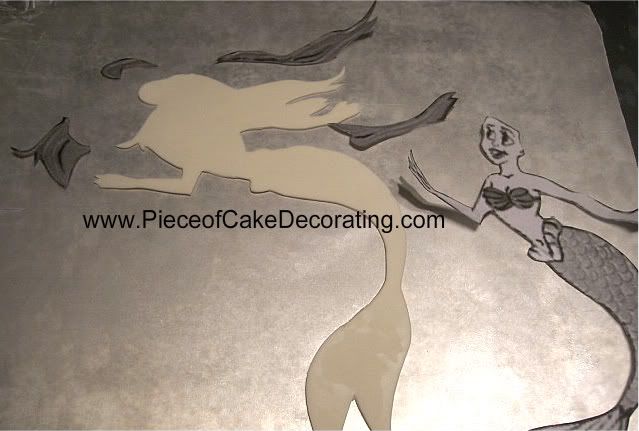
Cut the hair off your image.  I decided to cut the hair into 4 separate sections because it would be difficult to place the hair on in one piece and the fondant is more likely to stretch in the process.  We will be covering the seams later on.

Step 3

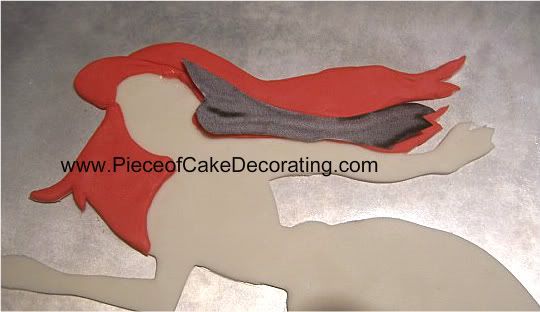
Roll out red fondant about 1/8 of an inch thick and cut out your hair pieces.  Attach with a small amount of water.  As you can see in this picture, I used my printed pieces to make sure I kept the general shape of the piece.  Here the hair stretched so, while the fondant was still soft, I adjusted its shape.  If I didn't do this, I run the risk of altering the shape of her arm, face or body.


Step 4

Repeat steps 2 and 3 with the fin and shell top.  The eyes, mouth and nose will most likely be too small to cut out so do your best to eyeball the general shape.

Step 5

With a large round tip, add half circles to the dark green section of her body to look like scales.  Then, with the gumpaste tool, add texture to the light green fins and her purple shell top.

Step 6

Use your clay extruder (optional) to make strands of hair.  If you don't have a clay extruder you can also roll the pieces out by hand.  Place them over seams and in a few other places to add texture and dimension.  Attach with a small amount of water.


Step 7

Brush pearl luster dust over the entire image.  This helps give the appearance of her being under water.  Then, using a thin brush, outline all your pieces with black edible ink.  Add extra detail to the hair, face, hands, body and bottom fins.  Dark blue ink is used on the eyes.  This step will also work with THIN edible markers.

Step 8
Let dry a few days (at least over night) before placing on your cake.


Read more »

In Labels: , , on .


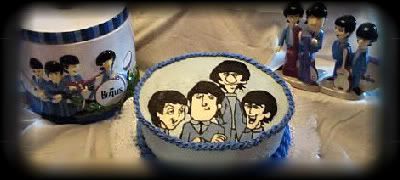
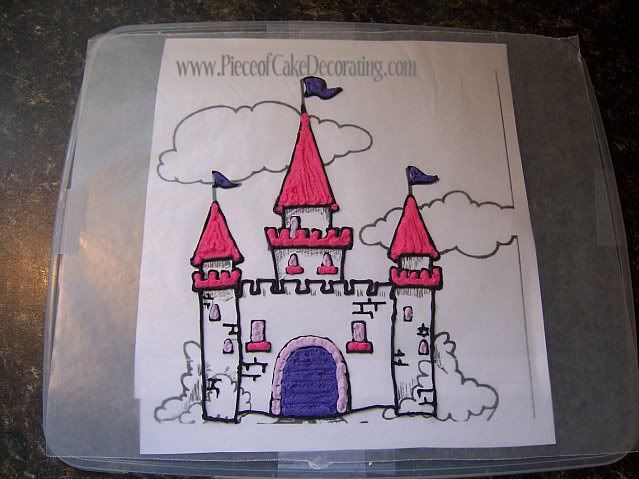
These are just a few examples of what you can do with a frozen buttercream transfer. It is simple to use and is a great way to get a picture on your cake without using an edible ink printer. As you can see with these cakes, the picture can either cover the entire top of the cake (Beatles Cake) or can be used as an accent (castle and Eagles cakes). It is really your preference, just make sure to plan ahead. After making your buttercream transfer icing, follow these simple steps to make a frozen buttercream transfer.

Step 1


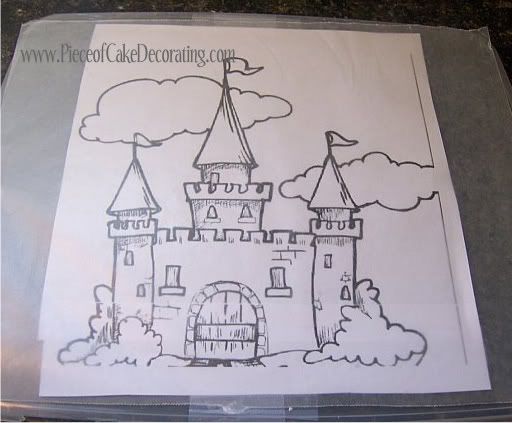
Find, copy, or print out a picture. Keep in mind that your final product will be a mirror image so, it is best to use the mirror image setting on your printer (especially when including letters). Once you have your picture, tape it to a stiff, movable surface like a cake board. Then, tape a piece of wax paper over your picture.


Step 2

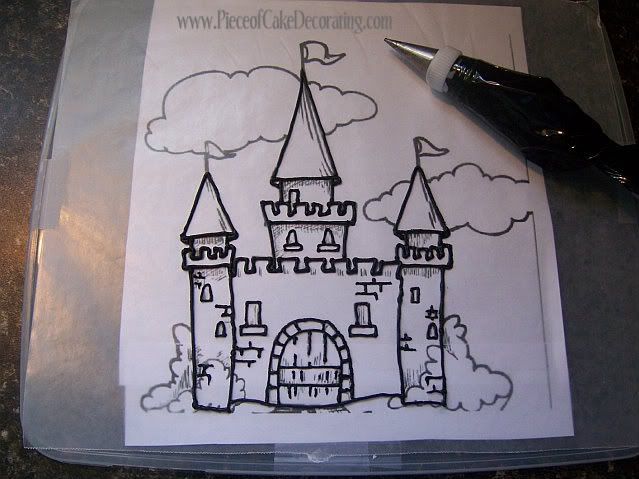
Pipe all of the outlines on your image with black icing and a small round tip (#2 or #1 depending how thin you need your outline). You can color your transfer icing black but I prefer to use a tube of black Wilton icing because it is very hard to get a true black.

***Notice how any detail I want to show in the final image is black (ie bricks on the castle) and I ignored those I was not interested in like the bushes and shadow lines. ***


Step 3

Now you need to start thinking of your picture in layers. For example, when making a face, you should fill in the colored part of the eyes, then the white parts, then the mouth, then the whole face. I say this because, when filling in the white part of the eye, you will not only pipe into the empty space but over top of the colored part as well. The same goes for the entire face. When filling in this area, you will cover the eyes, nose and mouth. If you do not fill in these features first, you will not see them in your final product. In other words, the first layer of your picture is the front of the picture. The last layer will be the part of the transfer that is laying on the cake.

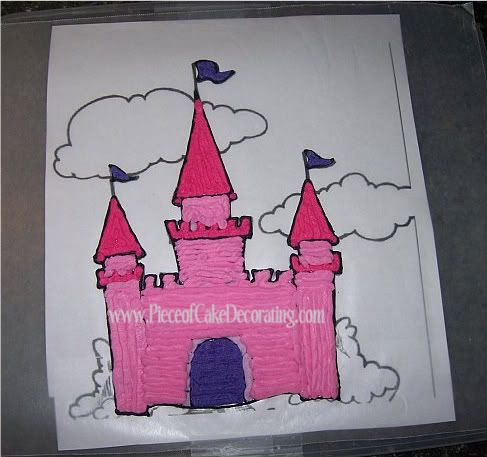
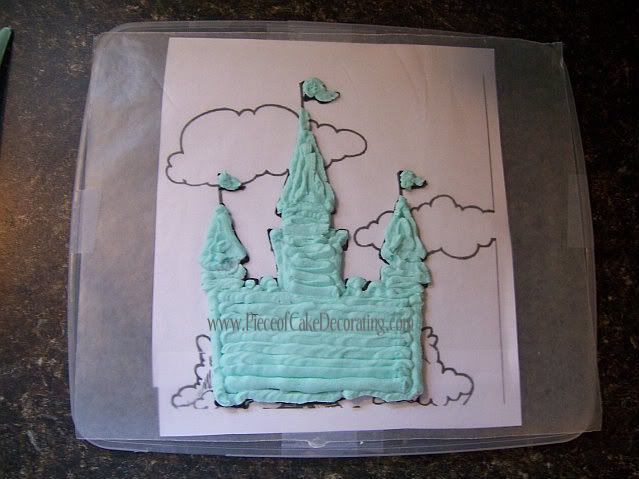
With that being said, you can now start coloring your icing and piping it onto your picture. Round tips work best. The size will vary depending on the amount of space you need to cover. Fill in with straight lines, as close together as you can. If you are still confused as to what order to pipe in, here is how I made the castle...


First fill in all the small pink and purple details like the tower peaks, windows, sills, door, and flags.


Then cover the entire large area of the castle with light pink icing.  The door and windows should be covered too.  I didn't cover the ENTIRE castle with light pink icing but I wasn't exactly neat about it either.


Step 4

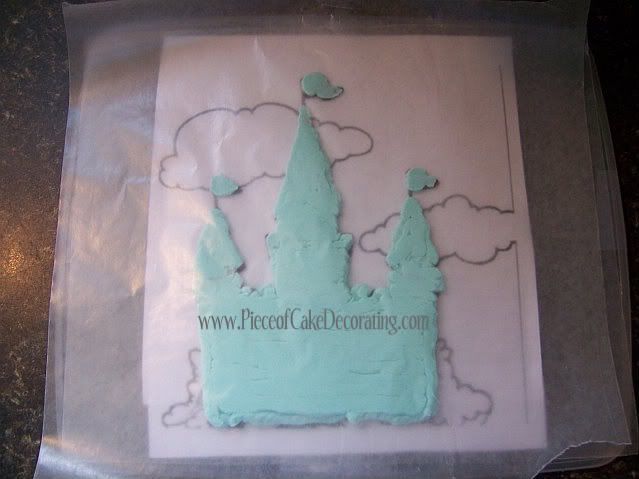
Now that your picture is completely filled in, take uncolored (or colored) transfer icing and a rose tip (flat and angled). Add one last layer of icing to the entire transfer.

*** If you remember from the final picture at the top, my castle was on a blue background.  I colored the final layer of transfer icing to match so it blends more when it is placed on the cake. ***


When that is complete, place another layer of wax paper on top and lightly push down on your transfer. Do not flatten the transfer. You are simply easing the piping lines together so they show up as a solid picture in your final picture.


Step 5

For best results, keep in your freezer for 1 day. If you are in a hurry, you may be able to get away with freezing it for a few hours.

Step 6

Place on your cake!

Read more »

In Labels: , , on .


This cake was made for a bridal shower and came out wonderfully.  To make this cake, I used a tutorial found on Cake Central.  Yes, that's right, even I use tutorials :)  It is how I have learned everything I know and I'm excited to share with you everything I find and learn.  I only made one small change to the Cake Central tutorial to make this cake easier for me to make.

Instead of carving the pot from round cakes, I used the Pampered Chef, 5 cup glass measuring cup/Cake Pan.  The Wilton Wonder Mold Cake Pan would work great too.

I decided to use this cake pan because the basic shape was already there.  This gave me more control when carving.  And don't forget to freeze that cake before you carve.

The "dirt" is crumbled chocolate cake.  Oreo cookies are another great option.

I think this cake is so cute and I've wanted to try it out for a long time now.  I hope you have as much fun as I did.
Read more »

In Labels: , , on .


These ruby slippers were used on a Wizard of Oz themed cake.  They can easily be personalized by changing the color or details.

In this tutorial you will use something called gum glue.  You can easily make gum glue by mixing about 1 tablespoon of water and a 1/4 teaspoon of gumpaste.  Stir the mixture as the gumpaste dissolves in the water.  It can be stored up to 1 week in the refrigerator.


You will need...

red fondant/gumpaste mixture
shoe template
Exacto Knife
decorator's brush
gum glue (water and gumpaste mixture)
tissues or napkins
pre made red icing
tip #2
piping gel
red sugar crystals


Directions:


Step 1

Print out your shoe template on card stock (especially the base support ).  Cut the pieces out and assemble the support.

Follow these steps to print your templates.
1.  Right click on the image and select 'copy image.'
2.  Open the program of your choice.  Word and Paint work great.
3.  Hit 'CTRL-V' to paste the picture on the page.

You now have the freedom to size the template to your needs.


***Decorator's Tip*** Making adjustments to your template is a great way to make your shoes unique.


Step 2

Using the red gumpaste, make the heels of your shoes and place them behind your base support.  Be sure to use the 'sole' template as a guide for the shape of your heel.


***Decorator's Tip*** Make your heal slightly higher than the support and have it follow the angle of the shoe.  This will give it a more natural looking arch.


Step 3


Roll out your gumpaste and cut out the soles of your shoe using the template and an Exacto Knife.  Brush the top of the heel with gum glue and place the soles on the support base.


***Decorator's Tip*** I chose to leave the shoe lining/insert off my ruby slippers.  If you will be using your insert, now is the time to roll out your gumpaste, cut out your piece and attach it to the sole of the shoe using a decorator's brush and gum glue.


Step 4
Roll out your gumpaste and cut out the tops of the shoe using the template and an Exacto Knife.  Apply a small amount of gum glue around the edge of the toe and put on the top of the shoe.  Use tissue or napkins to hold the shape until the gumpaste dries.


Step 5


Roll out your gumpaste one last time and cut out the back/side of the shoe using the template and an Exacto Knife.  Just as before, apply a small amount of gum glue to the remaining edge of the shoe and attach the final piece.  Use napkins or tissue to hold the shoe's form until the gumpaste dries.


The shoe will need to dry out for at least a day, maybe two.  Once you feel they are strong enough, move on to the next step.


Step 6

Using a tube of pre made red icing and tip #2, fill in the gaps around the edge of the shoe and where the sides meet the top.  This is also a good time to fill in any cracks in the gumpaste.


Step 7


Brush piping gel all over the shoe, inside and out.  Finally, roll the shoe in red sugar crystals.  All mistakes should be hidden and your shoe will sparkle in the light.


For another great gumpaste shoe tutorial visit www.how2cakes.com.
Read more »

In Labels: , , , , on .


Sugar plaques can be made a number of ways but the easiest is to use an edible image.  Below you will find the steps taken to make Emerald City in the Wizard of Oz cake pictured above.

You will need...


white gumpaste
edible image(s)
Exacto Knife
piping gel
decorator's brush
2 wooden dowels (optional)
white candy metls (optional)


Directions:

Step 1


Using a Exacto Knife, cut out your image and remove it from the backing paper.


Step 2

Roll out you gumpaste to at least 1/4 thick.  You can make it thicker but it will take longer to dry.

***Decorator's Tip*** It is important to use white gumpaste because it will not take away from the color of your image. Gumpaste will also harden faster than fondant.


Step 3

Place your rolled out gumpaste on a cake board or cookie sheet.  This will ensure your image does not tare or become distorted.  Then, with a brush, cover the back of your image with piping gel.

***Decorator's Tip*** Make sure you apply the piping gel as close to the edge as you can.


Once your image is covered, place it on the gumpaste and cut it out using your Exacto Knife.

***Decorator's Tip*** Notice how I have left a strip of gumpaste hanging below the image.  This is an optional step.  It was done because Emerald City will be standing up on the cake and I wanted the sugar plaque to sit in the cake a bit so it would survive delivery.


Step 4 (optional)


After a day or two, the gumpaste will be dry enough to add dowels to the back.  To do this you melt white candy melts and coat the top of your dowels.  Place the dowels on the back of your image at the appropriate height.  For extra security, add a little more chocolate over the dowels and let dry.


You are now ready to place your plaque(s) on your cake!
Read more »

In Labels: , , , , , on .

Since I began decorating cakes I have heard about the "Viva Paper Towel Method"  but have never tried it until now.  Basically, Viva Paper Towels are made without design so when pressed on an iced cake, the buttercream smooths out.  In two easy steps, you can have a smooth, professional looking cake.


Step 1

Ice your cake as you normally would but this time, allow the buttercream icing to crust up.  It is hard to judge how long this will take but it is an important step.  Here I played it safe and let my iced cake sit over night.


Step 2


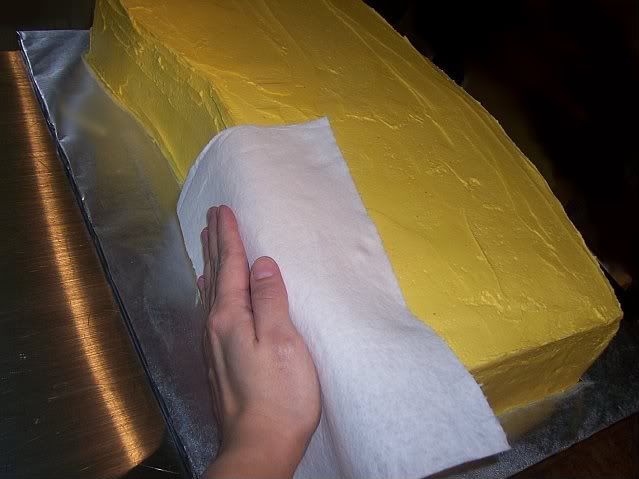
Once your buttercream has crusted, there are two ways you can use the paper towel to smooth your icing. The first uses your fondant smoother (left picture).  I like this tool because it keeps the surface flat.  The second method uses your hand (right picture).  This is a little tricky because you need to be sure to keep your hand and fingers flat and apply equal pressure but the natural warmth of your hand helps.  Both methods work so it is simply a matter of preference.


In this picture I have used the Viva Paper Towel on the right side of the cake.  It is easy to see that the icing is much smoother.


Once you are done, your finished cake should look something like this...

Read more »

In Labels: , , , , on .


My oldest son will be turning 3 soon and I am anticipating a request for a Thomas the Tank Engine Cake.  While searching for ideas, I came across this amazing tutorial.  The instructions and pictures are so helpful that I just had to share it with you.  Thank you Wendy for putting together this tutorial!

Thomas the Tank Engine Tutorial created by Wendy
Read more »

In Labels: , , , , on .

Gumpaste Hydrangea


I came across this great 2 part gumpaste hydrangea tutorial at the Petalsweet Cakes Blog. Part 1 of the tutorial gives detailed instructions and pictures to making the beautiful flowers seen above. Part 2 then discusses how to color and assemble the bouquet. 

*Update: Jacqueline has recently posted a Part 3 to her tutorial.  Here she discusses how to make the gumpaste leaves.

I know these flowers look intimidating but Jacqueline does such a great job with this tutorial that if you have just a little bit of gumpaste experience, you will be able to make these flowers.


Hydrangea Tutorial Part 1
Hydrangea Tutorial Part 2
*update: Hydrangea Tutorial Part 3
Read more »

In Labels: , , , on .

I came across this video and just had to share it. Here, David Cakes ices his cake with royal icing. He spreads it in such a way that the end result reminds me of an acrylic painting. Absolutely beautiful! This is a very creative and artistic way to decorate a cake. I cannot wait to try it!

Read more »

In Labels: , , on .

There are many products out there that claim to help you bake your cakes level. I like using a combination of 3 methods. I always bake my cakes on a baking stone. The stone helps the cake bake evenly so that it comes out more level and very moist. I also rotate the cake 180 degrees halfway through the baking process. This also helps the cake bake evenly because I do not have a convection oven. Finally I put at least 1 flower nail in each cake. The nail heats up and helps bake the middle of the cake the same as the edges. By putting these three methods together, much less cake is wasted.


Read more »

In Labels: , , , , , , , , , , , on .


Cake dowels are needed to give support to a cake. Without them, a stacked cake can fall or the filling will ooze out the sides when the cake settles. Your dowels can be made of wood or plastic and they are easy to put in a cake. Just follow these step...

  1. Place the first tier on your cake board. You will probably need 4-5 dowels for this layer (more dowels will be needed if you cake is more than 3 tiers high) and they will be placed in a circle around the center of the cake. Take one dowel and place it in the cake. Measure the height and mark it with a marker. Remove the dowel and cut to size. Wooden dowels cut best with a hedge trimmer but a bread knife will also work. A knife is the easiest way to cut a plastic dowel. Place the cut dowel back in the cake and repeat these steps for the remaining dowel in this tier.
  2. Place the next tier on top. With each tier, you will need less dowels. The wooden dowels for this tier will need to be sharpened with a pencil sharpener so that they go through the cardboard divider. Repeat the steps above but use a hammer to drive the wooden dowel to the bottom cake board. If using plastic dowels, you will not be able to go to the bottom of the cake. You can also choose not to sharpen and hammer the wooden dowel but it will not be as stable.
  3. Keep repeating these steps until you get to the top tier. Once you are on the top tier, sharpen your wooden dowel and hammer it down the center of your cake, all the way to the bottom cake board. This is an important step because it will keep your cake from tipping over.

A few extra notes about dowels...

  • You will need fewer dowels if you are using plastic.
  • If you choose to sharpen and hammer the dowels for each of the higher tiers, make sure you place them in a way that they will not hit the dowels below them.
  • If you are still confused, check out this video tutorial on How to Stacking Cakes.
Read more »

In Labels: , , , , , , , , , on .

Below you will find step-by-step instructions for creating a gumpaste bow. When working with gumpaste, you should remember to work quickly. It will dry fast which is why decorators like to use it for decorations. If you are a new decorator then try mixing fondant and gum paste. The fondant will dry faster with the gum paste in it but give you time to make the bow before it dries out.


  • Roll the gumpaste out to 1/8 inch thickness. Cut 2 long strips of the same size and 1 strip 2/3 the size of the larger strips. I am not giving exact measurements because they will vary depending on the size of your bow.


  • Make a small accordion fold at each end of the small strip and loop them together. Put a small amount of water on each end and press together. Take a small amount of tissue to place inside the loop so that it holds it's shape.


  • Repeat this process for the 2 larger strips.
  • Once the small loop is hard enough to hold it's own shape, remove the tissue and place the ends of the 2 larger loops inside. Secure with a small amount of water and press. Let dry over night.
Read more »

In Labels: , , , , , , , , on .


I've been looking for a video tutorial that shows how to make a buttercream rose for some time now. This video seems to be the best. In fact, the woman makes it look much easier than what I learned during my Wilton course. If you are still having trouble, we can make the rose for you using royal icing. Click here to purchase.


Read more »

In Labels: , , , , on .

This is a great video on how to stack cakes for a tier cake. She uses a lot of support but she also mentions that her cakes are safe to travel stacked.


Read more »

In Labels: , , on .


Here is a great tutorial by shopcountrykitchen.com on covering a cake with fondant. To color the fondant, simply put coloring paste onto the fondant right before the kneading process. It is important to need the fondant until it becomes stretchy so that it doesn't crack when you try to put it on the cake.


Read more »

In Labels: , , , on .


 Here is a great video on writing with icing. David gives some great tips on how to practice your writing before putting it on a cake.


Read more »

In Labels: , , , , , , on .


Here is a great link to a video that will show you how to level, tort, and fill your cake.
*Decorator's Tip* During the video I noticed that her cake slides around a lot when she is trying to fill it. I like to use skid proof cabinet liners under my cake. This will keep the cake from sliding around and they are also great to use when delivering a cake.

Also, if you are like me and have a hard time keeping a knife straight when leveling a cake, here is a great product.


Read more »

In Labels: , , , on .


My first tutorial is aimed at those cake decorators who are just starting and those who need a quick refresher. This video gives some great tips on making bags and piping on cakes.
Read more »

In Labels: , , , , , , on .