Solution Graphics

Foodbuzz
Ask an Expert - Visit my Virtual Office at LivePerson
Showing posts with label gumpaste decorations. Show all posts
Recently, Kima from Kima Konfections purchased a gumpaste airplane from PCD.  Here is a picture of the plane on the cake.  Thank you Kima for sharing this with us.  Below you can see a picture of the plane it was modeled after.


Send your photos to photos@pieceofcakedecorating.com for a chance to be featured on my site.  You can also purchase gumpaste decorations at PCD's Gumpaste Shop or place a special order with kseals@pieceofcakedecorating.com.
Read more »

In Labels: , on .


This sugar plaque is made from an edible image with a dried, gumpaste backing.  Your sugar plaque can have just about any image you want (trademark images excluded).  In the notes to seller please indicate whether you would like your image to stand up on your cake (like above).  These plaques will have dowels attached with chocolate on the back.  Once I receive your order, I will contact you via e-mail to obtain the picture.


Sugar Plaques can now be purchased through my sister site www.KimsCake.com.
Read more »

In Labels: , , , , , on .


The ruby slippers were used on a Wizard of Oz themed cake but, as you can see, I can make a variety of styles and colors.  At the time of purchase please describe the shoes as best as you can in the notes to seller.  It is always an added plus if you can provide a picture.  If this is possible, please mention it in the notes to seller as well.

Visit my handmade shop to purchase.
Read more »

In Labels: , , , on .


These ruby slippers were used on a Wizard of Oz themed cake.  They can easily be personalized by changing the color or details.

In this tutorial you will use something called gum glue.  You can easily make gum glue by mixing about 1 tablespoon of water and a 1/4 teaspoon of gumpaste.  Stir the mixture as the gumpaste dissolves in the water.  It can be stored up to 1 week in the refrigerator.


You will need...

red fondant/gumpaste mixture
shoe template
Exacto Knife
decorator's brush
gum glue (water and gumpaste mixture)
tissues or napkins
pre made red icing
tip #2
piping gel
red sugar crystals


Directions:


Step 1

Print out your shoe template on card stock (especially the base support ).  Cut the pieces out and assemble the support.

Follow these steps to print your templates.
1.  Right click on the image and select 'copy image.'
2.  Open the program of your choice.  Word and Paint work great.
3.  Hit 'CTRL-V' to paste the picture on the page.

You now have the freedom to size the template to your needs.


***Decorator's Tip*** Making adjustments to your template is a great way to make your shoes unique.


Step 2

Using the red gumpaste, make the heels of your shoes and place them behind your base support.  Be sure to use the 'sole' template as a guide for the shape of your heel.


***Decorator's Tip*** Make your heal slightly higher than the support and have it follow the angle of the shoe.  This will give it a more natural looking arch.


Step 3


Roll out your gumpaste and cut out the soles of your shoe using the template and an Exacto Knife.  Brush the top of the heel with gum glue and place the soles on the support base.


***Decorator's Tip*** I chose to leave the shoe lining/insert off my ruby slippers.  If you will be using your insert, now is the time to roll out your gumpaste, cut out your piece and attach it to the sole of the shoe using a decorator's brush and gum glue.


Step 4
Roll out your gumpaste and cut out the tops of the shoe using the template and an Exacto Knife.  Apply a small amount of gum glue around the edge of the toe and put on the top of the shoe.  Use tissue or napkins to hold the shape until the gumpaste dries.


Step 5


Roll out your gumpaste one last time and cut out the back/side of the shoe using the template and an Exacto Knife.  Just as before, apply a small amount of gum glue to the remaining edge of the shoe and attach the final piece.  Use napkins or tissue to hold the shoe's form until the gumpaste dries.


The shoe will need to dry out for at least a day, maybe two.  Once you feel they are strong enough, move on to the next step.


Step 6

Using a tube of pre made red icing and tip #2, fill in the gaps around the edge of the shoe and where the sides meet the top.  This is also a good time to fill in any cracks in the gumpaste.


Step 7


Brush piping gel all over the shoe, inside and out.  Finally, roll the shoe in red sugar crystals.  All mistakes should be hidden and your shoe will sparkle in the light.


For another great gumpaste shoe tutorial visit www.how2cakes.com.
Read more »

In Labels: , , , , on .


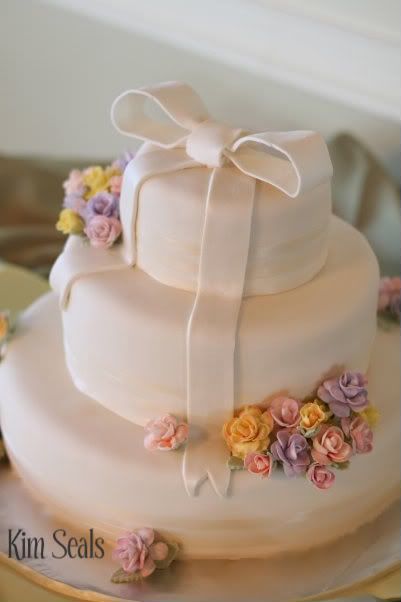
In this guide you will be given resources for stacking cakes and making a gumpaste ribbon as well as learn how to place real ribbon around the sides.  You can make decorating a wedding cake even easier by purchasing all gumpaste decorations needed from my handmade shop.

In honor of my friend Donna's 1 year wedding anniversary, I would like to share one of my wedding cakes with you. I did not make Donna's cake, however, I did make this cake for another friend this past June. It was a blast to make and I was honored to play a part in her special day.


To make this cake you will need...

2 14 inch round, 2 inch high cakes
2 10 inch round, 2 inch high cakes
2 6 inch round, 2 inch high cakes
Filling of your choice
About 5 batches of buttercream icing
5-6 lbs of ivory fondant
40 gumpaste roses of various sizes and colors
20 gumpaste leaves
1 ivory gumpaste bow
Ivory ribbon
Piping gel
6, 10, 14 inch round cake dividers
Wooden dowels
18 inch round wooden cake board
Wilton fanci foil

Here are a few items that can save you time and make decorating this cake even easier...


Directions


Step 1

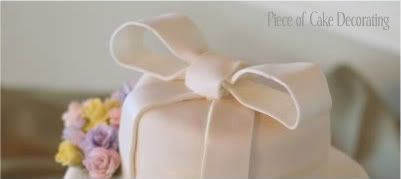
A few weeks in advance make your gumpaste roses, leaves, and bow. For an added pop, add luster or pearl dust to your decorations. Click here for a tutorial on how to make a gumpaste bow.

Also cover your cake board with Wilton Fanci Foil.

***Decorator's Tip*** It is important to use a wooden cake board because your cake will be very heavy and you need to make sure it will be supported.


Step 2

Level, tort and fill all cakes. Each cake should be placed on it's own cake divider and covered in fondant separately. Ice each cake with buttercream icing and then cover with fondant. Click here for tips on how to cover a cake with fondant.


Step 3

Place wooden dowels around the center of the bottom two layers for support. The larger the layer, the more dowels you will need. Be sure to leave the center open because once all the cakes are stacked you will need to drive a sharpened dowel down the center of all 3 layers. Click here for more tips on how to stack cakes.


Step 4

Using a brush and some piping gel, add the ivory ribbon to the cake.


Step 5

Make 2 ribbons out of fondant and drape them down the front of the cake as pictured. As you can see from my picture, one fondant ribbon is longer than the other. Use piping gel or buttercream icing to hold them in place. Next, place the gumpaste bow on top of the cake.

***Decorator's Tip*** Leave the bow on top of the cake to help you with the placement of the roses in the next step. However, when transporting the cake, it would be a good idea to leave the bow off. Once the cake is at the reception, attach the gumpaste bow with a little bit of buttercream icing.


Step 6

Place the roses on the cake. There is no right or wrong way to do this, just trust your instincts. Once all of the roses are on, add the leaves to fill in the spaces.


That's it! Decorating a wedding cake can feel overwhelming at first but if you just take one tier at a time, it is a lot easier than you think.


If you are looking for some great bridal jewelry, check out Annette Piper Dip.Gem. Handcrafted Jewellery. She also has a great blog called Under the Loupe.
Read more »

In Labels: , , , , , , , on .