Solution Graphics

Foodbuzz
Ask an Expert - Visit my Virtual Office at LivePerson
Showing posts with label Decorating Tricks of the Trade. Show all posts
Last month my oldest son turned four and wouldn't you know, he asked for a roller coaster on his cake!  Because I am always looking to challenge myself, I was determined to make it edible.  After searching the internet for pictures, it was nearly impossible to find a cake with a gumpaste roller coaster.  The few I found I wasn't crazy about but I learned enough to create something I loved.  In the end it was the easiest part of the entire cake and I am excited to share it with you.
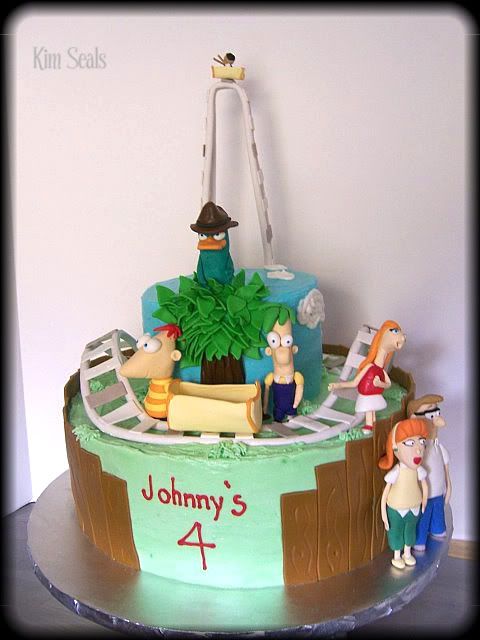
The cake is themed around the Disney cartoon Phineas and Ferb.  More specifically, the episode where the brothers build a roller coaster.  All the characters were hand made from gumpaste and the cakes are 12 and 6 inch rounds iced in buttercream with fondant details.

Give yourself about a week to let the roller coaster dry.  You may be able to get away with making it a few days earlier but I wouldn't risk it.  You will need...

clay extruder
flexible cardboard (I used a USPS shipping envelope)
tape
dowels
floral wire (20+ gauge)
cookie sheet and styrofoam
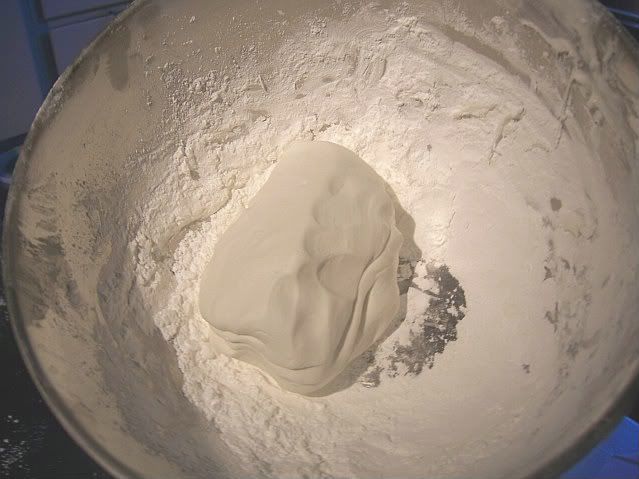
gumpaste (1lb)


Step 1

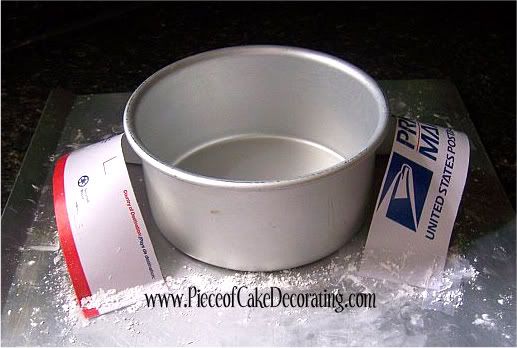
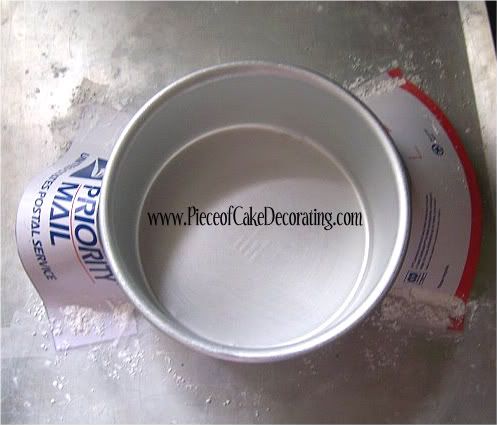
Before you can begin working with the gumpaste you need to create a "mold" or form for your roller coaster to dry on.  This roller coaster was made in two parts and the forms were made according to the pictures below.

I used a 6 inch cake pan to make sure my roller coaster was the right size.
The powdered sugar is important.  The last thing you want is for your gumpaste to stick.

You are now ready to make the rails of your roller coaster. This is extremely easy if you have a clay extruder.  Place your gumpaste into the extruder and using the largest circle disk, press out your rails.  Don't worry if your rail is not long enough.  You can hide the seam later with a plank.  Once you have 2 rails around your cake pan, spaced 1 inch apart, you can move on to your tall piece.

* Please note:  I forgot to take a picture of the gumpaste sitting on the form but, I did not make a full circle. I left a space in the back to place the tall piece of the roller coaster. *

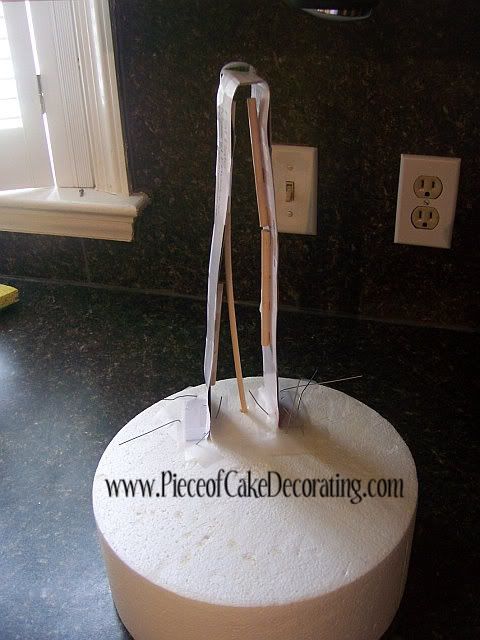
Dowels were taped to the cardboard for added support.  One dowel was stuck into the Styrofoam for stability.

Once the form was secured to the Styrofoam with tape, I used wire to be absolutely sure it would not come off.  The rails were made the same as before however this time I inserted a wire about 2-3 inches into each end of the rails and entirely into the Styrofoam.  The wire will give this tall piece more support when put on the cake.

**Decorator's Tip** For even more support and food safety, place drinking straws over the exposed wire before putting it on the cake.  This piece will not budge!


Step 2

Roll out your gumpaste and cut 1 inch x 1/2 inch rectangles for the beams/slats of the roller coaster.  Let them sit for a few minutes to become a little stiff then attach with water or gum glue (a mixture of gumpaste melted in water).  Make sure you cover any seams in your rails.

Store in a cool dry place and after a week it should be stiff enough to place on your cake.
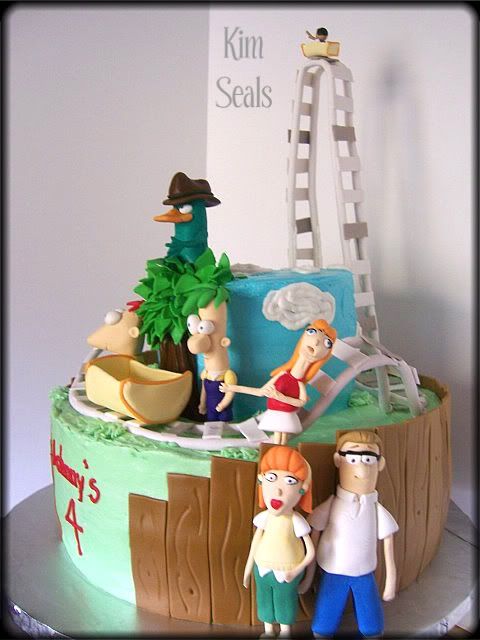


Here is another view for you to reference.  I was nervous about this roller coaster and a little over booked with cakes so mine actually sat for 3 weeks!  My husband swore it would fall apart but it did not budge and was completely hard.
Read more »

In Labels: , , , , on .


Well it probably isn't a new trick but it definitely new to me and I feel silly for not thinking of this sooner.  If you've ever stacked buttercream covered cakes like the one here, you know how easy it is to put fingerprints and smudges in your beautifully iced cake.  After years of this issue, it finally occurred to me that frozen buttercream smudges a whole lot less then chilled or room temperature buttercream.  I mean think about it, isn't that the whole idea behind the frozen buttercream transfer?

I start by icing the upper tiers first.  If we call the bottom tier, tier 1, I will cover tiers 2, 3, 4...etc. in that order.  As each tier is covered I place it in the freezer.  Once all the tiers are freezing I ice the bottom tier, dowel it and start stacking.  The cakes have only been in the freezer long enough to harden the icing for a moment so you will need to work fast.  And this doesn't mean you can hold the cake like you would a fondant covered cake because your warm hands will leave some kind of mark but, if you do need to touch the cake you won't leave a huge hole in your icing. 

Here are some other links to help you stack a cake...

Video Tutorial: Stacking Cakes
Video Tutorial: Using Dowels
Recipe: Buttercream Icing
Tutorial: Icing a Cake w/the Viva Paper Towel Method
Read more »

In Labels: , on .

Marshmallow fondant (MMF) is easy to make but can be tricky to work with when used for more than covering cakes.  As you may know, you can put your MMF in the microwave for a few seconds if it is too hard to knead.  This is an easy fix to the problem but, after it is rolled out it will stretch and change shape easily...not ideal for decorating.  To combat this problem I simply let the fondant sit for a few minutes after it is rolled out.  Once it cools down, it is less likely to stretch.  I also try to microwave the MMF just long enough to make it workable.  I let the kneading soften it further so that it is ready to decorate with from the start.
Read more »

In Labels: , , , on .

Making a template is a great way to get the the right shape when carving and decorating a cake.  With these easy steps, you can create a template to fit any design.

You will need....

several sheets of paper or large poster board
tape (optional)
tape measure
pencil
scissors


Step 1


Take a few sheets of paper and tape them together.  Once they are lined up, use a tape measure to re-size your paper to the measurements of your cake pan.

***Decorator's Tip*** Poster board is another option.  It is already large so it will save you the step of taping.


Step 2


Draw your picture on your re-sized paper.  After drawing, I like to fold the paper in half and cut along the lines I am happier with.  I do this for templates that need to be symmetrical.


Step 3


Open it up and check your work then, make any necessary adjustments.  Here I drew the details on my template to help me visualize the end result.

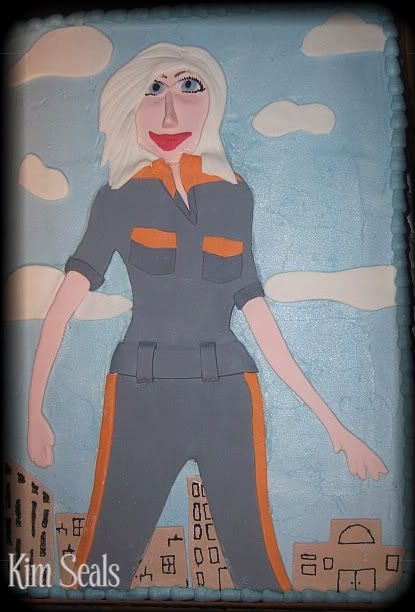
That's it!  You are ready to use your template.  Here are a few examples of when a template will come in handy.  The template above was used to make the first cake.


Here I used a template to get the shape of the basketball jersey.  It was very helpful in achieving symmetry.


In this cake, the template not only gave me the shape of the house but I cut it up into smaller sections (ie door, window, roof peek, etc) to keep proportions.


Here is another example of cutting the template into sections to keep proportions.  However, in this example I blew up a picture and printed it out.


I used a template on the guitar because, honestly, this is just not something I can free hand.


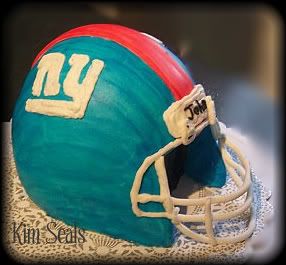
On this cake a template was used to create the NY on the helmet.  More detailed instructions can be found in my Piping with a Template Tutorial.


As you can see, templates are a big part of my decorating process.  Free hand piping and carving is very difficult and templates are a great decorating tool to utilize in these situations.
Read more »

In Labels: , on .

I could not wait to share with you this new show on TLC.  "Fabulous Cakes" follows professional cake decorators throughout the country as they undertake the long process of creating an edible work of art.  This show is perfect for decorators like me because I am always looking to learn something new but am not in a position to attend pastry school.  Every show, the featured decorator takes you through the step-by-step process of creating a fabulous cake with an added emphasis on technique.  And if you are wondering how much these works of art cost, you will be amazed when the price is revealed.  I knew these cakes can be pricey but even I am shocked at times.

My favorite episode was when a NY decorator, working from home, created a 4 foot dog.  By showing you how to create the basic structure, is not long as intimidating as it once was.  While I could not find a clip of this episode, here is a snippet from another episode which features decorators from Las Vegas.

Check your local listings for air times and dates.

Read more »

In Labels: , , on .

Having a family member decorate your wedding cake is a great way to save money on your special day.  I know wedding cakes can be intimidating but if you think about it, it is really only 3 (or more) cakes in one.  So if you can decorate one cake, you most certainly can decorate three!  And if stacking makes you nervous, there are  some great alternatives out there.

Before you can start baking, you need to plan ahead and draw a sketch or, in the very least, put your thoughts down on paper.  Here are some ideas to help you start planning...

Tier Arrangement

If you want the look of a stacked cake but the thought of doweling a cake scares you, here is a great alternative.  This floating cake stand gives the appearance of a stacked cake but each tier can be transported separately and no dowels are involved.  This stand is sold by Wilton Industries and is easy to assemble.  It should be noted, however, that the top two tiers should not be very heavy.


Here is the same cake arranged differently.  There are many cake stands out there to accommodate this type of arrangement.  If the tiers were made for this type of placement, I would have probably put a few flowers in the center of the larger cakes.  Here are a few stands to help you achieve this look...


If you are looking for a more traditional look then stacking your cakes is the way to go.  Some important things to remember when stacking a cake...

  1. Each tier (except for the bottom) should be placed on its own cake board.
  2. To help you center each tier and find the best placement for the dowels, use a cake board to mark the next level's location.
  3. VERY IMPORTANT! You must use dowels to support each tier.  Also, hammer a sharpened dowel down the center of the entire cake for extra stability.  View this helpful video for more information on doweling a cake.


Decorations

Once you have decided on the placement of your cakes, it is time to start thinking about decoration.  Will your cakes be covered in fondant or buttercream?  If purchasing fondant, I recommend Satin Ice.  It is easy to work with, tastes better than most, and is affordable.  If you plan on making your own, consider marshmallow fondant.  It is super easy to make and tastes fantastic.  Find all of our cake and icing recipes here.


The easiest way to decorate a wedding cake is by using fresh flowers.  Your local florist can be very helpful in this area.  They will help you coordinate colors and make sure all of your flowers are food safe.  However, please remember to use a food safe flower spike when sticking any kind of flower in a cake.


If you have your heart set on gumpaste decorations for your cake but you lack the skill, Piece of Cake Decorating can help!  I now sell complete cake kits, gumpaste flowers, or custom gumpaste decorations.  For more information, please visit my gumpaste shop or e-mail me at kseals@pieceofcakedecorating.com.
Read more »

In Labels: , , , on .

Transporting a cake can be the trickiest and most stressful part of decorating a cake.  Here are a few tips to put your mind at ease.

Grip-It Shelf and Drawer Liner - Black
click for more info & to purchase
  1. First and foremost, place cabinet liner under your cake.  Even a small amount will keep the cake from sliding around.  I even give some to my customers when they pick up the cake.
  2. If your cake is stacked, even just 1 extra tier, place a sharpened dowel down the center of the cake.  For added support, hammer the dowel into the cake board slightly.
  3. If your cake is higher than 3 tiers, it is probably a smart idea to build your cake in two or three parts and assemble it on site.

The first of these steps is most important so make sure you purchase cabinet liner.  A little goes a long way.  For more tips on doweling a cake, view this recommended video tutorial.
Read more »

In Labels: , , on .


Today's post is inspired by a reader's question. She asked me for advice on working with fondant.  It can seem tricky if you aren't used to the nature of the product.  In fact, I started working on my own with fondant but never could get it quite right until I took a class and learned a few tricks that I wouldn't have figured out otherwise.  Here are a few important tips to help get you started.


  1. Kneed the fondant until it is pliable like taffy.  If the fondant is too dry then it won't lay right on the cake.  This was my biggest problem when I started.
  2. Make sure your surface is well covered with powdered sugar and your hands are greased with Crisco or vegetable shortening.  A fondant mat is probably a good purchase because most counter surfaces will suck the moisture out of your fondant (another problem I encountered).
  3. Fondant dries up quickly so make sure any fondant you are not using is in an air tight container AND covered in plastic wrap.

The fondant mat I just mentioned and a fondant rolling pin are great purchases.  A wooden rolling pin will suck the moisture out of your fondant so don't use that. A fondant smoother (pictured below) is also helpful in getting your fondant to lay smooth on your cake.  Just make sure it is dusted with powdered sugar or corn starch.


Buying fondant can be a bit pricey when you are starting out, that is why I use marshmallow fondant.  It is easy and cheap to make plus it tastes great! But, if you don't always have time to make your fondant, Satin Ice Fondant is a great choice.


Finally, try not to roll your fondant out too thin.  The thinner the fondant, the more imperfections you will see.  That is also why it is important to ice your cake as smooth as possible before you apply your fondant.  Once your cake is iced, let the icing crust up a bit then apply a small layer of piping gel around the bottom of your cake.  This will help the fondant to stick.  It has also been my experience that fondant on top of crusted icing gives it a cleaner look and a sharper edge.

Remember, practice makes perfect so don't give up if you have trouble the first few times.  You'll get it eventually.  If you have any other questions regarding this topic, please e-mail them to kseals@pieceofcakedecorating.com and you will get a response within 24 hours.   Your questions will also help other readers as I will continue to add to this post as they come in.


Gumpaste is very similar but it dries MUCH faster.  I am still learning the ins and outs of gumpaste, especially when it comes to making characters.  The gumpaste tricks I have been learning will be coming soon to PCD.
Read more »

In Labels: , , on .


In the picture above I wanted to add the NY Giants logo to the side of a helmet cake.  I knew there was no way I would be able to pipe it free hand, make it straight AND be happy with the location on the first try.  My solution was simple...


  • Make a template. I made a rough sketch but you could also print the logo off the computer.
  • Stick it on and trace it with a toothpick.
  • Pipe on the logo using the outline I made.
Read more »

In Labels: , , on .

CSN stores has recently given me the opportunity to review the CucinaPro Pasta Fresh Machine (retail value $41.99) and Trenette Pasta Attachment (retail value $17.99).  Pasta machines can be very useful when it comes to rolling out fondant.  I have to admit, it did make a bit of a mess but, it definitely cut my decorating time in half.

My Experience

I cannot say enough that I was very excited to review a product like this.  I absolutely love kitchen gadgets that are useful in both cooking and cake decorating.  A pasta machine is definitely one of those items so there is no need to feel guilty about spending the money.  Before I begin, I would also like to mention that this is my first time EVER using a pasta machine.  It was a bit of a trial and error experience and probably the reason for the huge mess it left my kitchen.  Check back again soon because I will be updating this post with my 2nd experience.


My first step was to clamp the machine to the counter and generously coat it with powdered sugar.  This prevented the fondant from sticking and made a little bit of a mess.


Before moving on, I kneaded the fondant so that it was pliable and ready for decorating.  I then set the machine to setting #7 (the largest setting) and sent the fondant through.  That was it...The fondant was ready to be cut or shaped any way I desired.  In this case, I cut it into long strips and made ribbon roses which you will see on the finished cake.


I also wanted to try the pasta attachment.  The fondant pasta I will be specifically making is trenette pasta.  My thought was that if everything worked correctly, I will be left with long, even strips of fondant.  To do this I sent another piece of fondant through the rollers.  It was still too big to use the attachment so I lightly rolled it up, set the machine to setting 5 and rolled out the fondant again.  It was now ready to send through the trenette pasta attachment.  At this point I lightly rolled up the fondant again making sure there was enough powdered sugar to keep it from sticking to itself.  I then dusted the attachment and sent the fondant through.  As you can see from this picture, it worked exactly as I planned.  I used these strips to make stripes on the side of this cake.


This pasta maker was a big help and is definitely something I will use again.  During the quick process, my only frustrations were the huge mess and the fact that the handle kept popping out and falling on the ground.  But, as I mentioned before, this could be due to my inexperience with pasta machines.

Here is a picture of the final cake that was made using this pasta machine.  It was easy to use and I highly recommend this product to anyone looking for an inexpensive pasta machine.  To purchase this product visit www.csnstores.com.
Read more »

In Labels: , , , on .

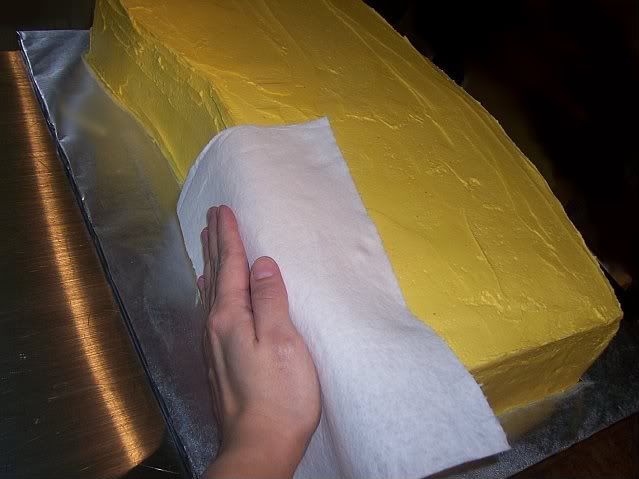
Since I began decorating cakes I have heard about the "Viva Paper Towel Method"  but have never tried it until now.  Basically, Viva Paper Towels are made without design so when pressed on an iced cake, the buttercream smooths out.  In two easy steps, you can have a smooth, professional looking cake.


Step 1

Ice your cake as you normally would but this time, allow the buttercream icing to crust up.  It is hard to judge how long this will take but it is an important step.  Here I played it safe and let my iced cake sit over night.


Step 2


Once your buttercream has crusted, there are two ways you can use the paper towel to smooth your icing. The first uses your fondant smoother (left picture).  I like this tool because it keeps the surface flat.  The second method uses your hand (right picture).  This is a little tricky because you need to be sure to keep your hand and fingers flat and apply equal pressure but the natural warmth of your hand helps.  Both methods work so it is simply a matter of preference.


In this picture I have used the Viva Paper Towel on the right side of the cake.  It is easy to see that the icing is much smoother.


Once you are done, your finished cake should look something like this...

Read more »

In Labels: , , , , on .

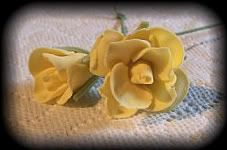
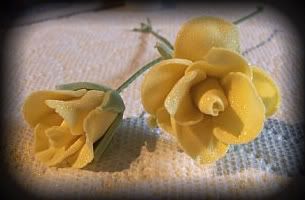
This edible glitter is used in cake decorating to make your decorations stand out. If you look at the before and after pictures below, you can easily see that luster dust gives your cake decorations that extra pop. Wilton calls it Pearl Dust while other companies call it Luster Dust. It can be found at most craft stores or you can purchase it right now from Amazon.com (look below the pictures for a link). Just use the arrows to rotate the carousel and click on the color of your choice. We also sell a variety of gum paste flowers just like these. Click here to purchase.


Gumpaste Roses Before Gumpaste Roses After


Read more »

In Labels: , , , , on .