Solution Graphics

Foodbuzz
Ask an Expert - Visit my Virtual Office at LivePerson
Showing posts with label cake decorating. Show all posts
Transporting a cake can be the trickiest and most stressful part of decorating a cake.  Here are a few tips to put your mind at ease.

Grip-It Shelf and Drawer Liner - Black
click for more info & to purchase
  1. First and foremost, place cabinet liner under your cake.  Even a small amount will keep the cake from sliding around.  I even give some to my customers when they pick up the cake.
  2. If your cake is stacked, even just 1 extra tier, place a sharpened dowel down the center of the cake.  For added support, hammer the dowel into the cake board slightly.
  3. If your cake is higher than 3 tiers, it is probably a smart idea to build your cake in two or three parts and assemble it on site.

The first of these steps is most important so make sure you purchase cabinet liner.  A little goes a long way.  For more tips on doweling a cake, view this recommended video tutorial.
Read more »

In Labels: , , on .

My next featured decorator is April Bellia of April Cakes.  Her business is located in Vancouver, Canada, home of the upcoming Winter Olympics.  April specializes in wedding cakes and desserts but has made a variety of specialty cakes as well.  I especially love that April has teamed up with Picture Perfect Cakes to teach cake decorating classes to decorators of all levels.  It was very difficult to choose only a few pictures to share so make sure you visit her website for more photos.

This first group comes from her wedding cake gallery.  You really can see why this is her specialty.


I chose this first cake because I am partial to orchids and I love this color combo.
 .
The fondant drape in this next cake is so elegant.

Cakes this tall always amaze me because so much work goes into making them this beautiful

This last wedding cake is my favorite of April's.  The square tiers, fresh flowers, layer orientation and piping make this a work of art in my book.


This last group of cakes are from April's Celebration Cake Gallery.


I always admire gumpaste people.  It is one skill I wish I had.


This cake is right up my son's ally.  I love how the number 2 is a road.


Finally, this small tier cake is great for an anniversary party.  These roses are one of my favorite colors.
Read more »

In Labels: , , on .


My oldest son will be turning 3 soon and I am anticipating a request for a Thomas the Tank Engine Cake.  While searching for ideas, I came across this amazing tutorial.  The instructions and pictures are so helpful that I just had to share it with you.  Thank you Wendy for putting together this tutorial!
Thomas the Tank Engine Tutorial created by Wendy
Read more »

In Labels: , , , , on .

This week I would like to change things up a bit and feature a fellow Mommy Cake Decorator.  The cakes you will see below were made by Lisa from Mom Blog.  She blogs about her life as a stay-at-home mom of three.  Just like me, she discovered her passion for cake decorating after taking the Wilton Decorating Courses.  These are just a few of  her cakes so make sure you stop by her blog and see what else she has created.

This monkey cake is my favorite of her cakes by far.  How cute is that!


I love the sandals on this cake.


I have been wanting to make a castle cake since Wilton came out with this kit.  I love Lisa's creative take on it.


I chose this cake because of how realistic it looks!


Thank you Lisa for sharing your cakes with us!  I look forward to seeing what you will create next.

Contact me if you would like to share your cake creations with Piece of Cake Decorating.  Cake decorators of all levels are welcome!
Read more »

In Labels: , , on .

Our next featured cake boutique is the Buttercream Studio. Located in the San Francisco Bay Area, this studio focuses on the artistry of cake decorating. Below you will find some of my favorite cakes from their amazing portfolios.

This first group of cakes comes from their Specialty Cakes Portfolio. The attention to detail given in all of these cakes is absolutely amazing.

Yes, this White House replica is really cake!

White House Cake


I would have loved to see the look on the little girl's face when she saw this birthday cake!

Fairy Cake


Look at the icons on this phone cake. I didn't think it was possible to make something that small!

iPhone Cake


All I have to say is, I love everything about this cake.

Handbag Cake


This next group of cakes comes from their Wedding Cakes Portfolio.

I chose this first cake because of the bright colors and the beautiful flowers.

Wedding Cake 1


The combination of colors and the flowers caught my attention on this cake.

Wedding Cake 2


In my opinion, I saved the best cake for last! If I could do it all over again, this would be my wedding cake. I love the words embossed in the cake not to mention everything else about it. Perfect!

Wedding Cake 3

There are so many more cakes to see so stop by The Buttercream Studio and check them out. You wont be sorry!
Read more »

In Labels: , , on .

I came across this video and just had to share it. Here, David Cakes ices his cake with royal icing. He spreads it in such a way that the end result reminds me of an acrylic painting. Absolutely beautiful! This is a very creative and artistic way to decorate a cake. I cannot wait to try it!

Read more »

In Labels: , , on .

Forum Screen

Can I decorate with ganache icing? Can you freeze buttercream icing? How many batches of icing and cake mix do I need? How long can you freeze a cake?

These are just some of the cake decorating questions people are asking in their Google searches. It may be difficult to find answers to these specific questions but not anymore. Piece of Cake Decorating is now offering a Q & A Forum. This is the place to ask any cake question you may have. We will even help you brainstorm ideas. So be sure to visit us at http://pieceofcakedecoratin.forumotion.net.
Read more »

In Labels: , , , , , on .

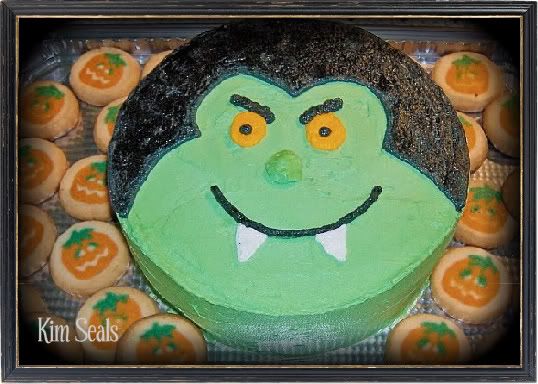
Vampire Cake

In this guide you will be given step-by-step instructions on how to decorate this cute vampire cake.

I know it seems early but Halloween will be here before you know it. If you are planning a party this year, don't forget the cake! Between HBO's True Blood and the Twilight series, Vampires are all the rage right now. Here is an easy vampire cake that just about anyone can do.

To make this cake you will need...

2 10 inch round cakes
Green, black, yellow/gold and white buttercream icing
4 Tips # 5

Recommended products: It is very difficult to make true black. When I only need a small amount like this, I always buy pre-made black icing.


***Decorator's tip*** If you do not have four #5 tips, do not worry. You will get the same effect using tips #4 or 6. If you do not want to use a tip at all, just cut the end of the piping bag to size. It will work just as well but your lines will not be as tight. This techniques works best for piping the eyes and nose because of their shape.


Directions:


Step 1

Level, tort and fill the cakes. They can be placed on a 12 or 14 inch cake board. In this picture, the cake is placed on a large cake board with Pillsbury Pumpkin Sugar Cookies scattered around for added decoration. Ice the cake with your green buttercream icing.


Step 2

Using a toothpick, outline the vampire's hair. Next, using tip #5 and black buttercream icing, pipe the outline of the hair and fill in with tight lines.


***Decorator's Tip*** To smooth out the striped effect you get from filling in an outline using a piping bag, simply put a little cornstarch on your finger and gently pat it flat. Most of the cornstarch will fade into the icing but the excess can be brushed away with a decorating brush.


Publish Post

Step 3

Using tip # 5 and yellow icing, pipe the eyes on the cake. Add the pupils using the extra black icing.


Step 4

Using tip # 5 and green icing, pipe the nose. Next, add the mouth and eyebrows with the left over black icing and the teeth (tip #5) with white icing.
Read more »

In Labels: , , , , , , , , , , , on .


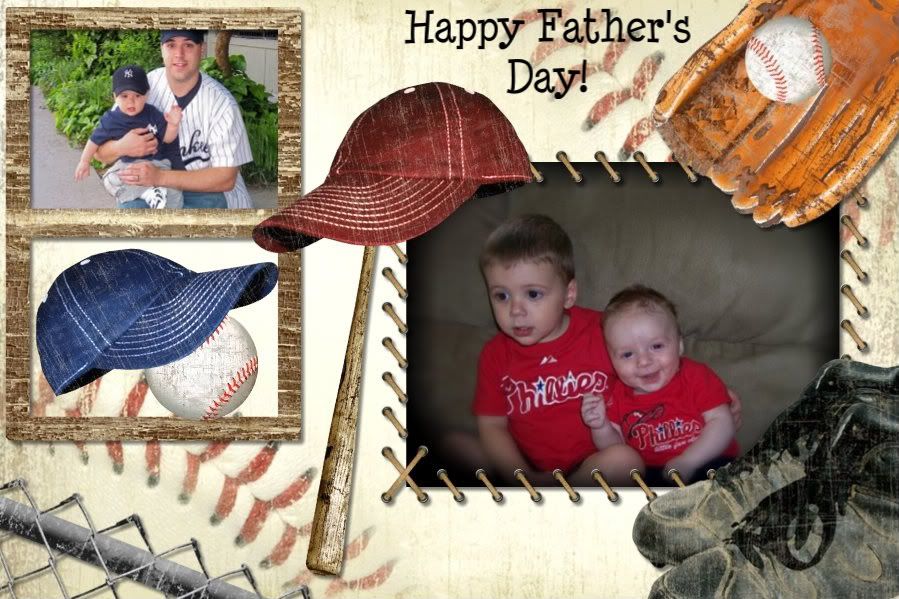
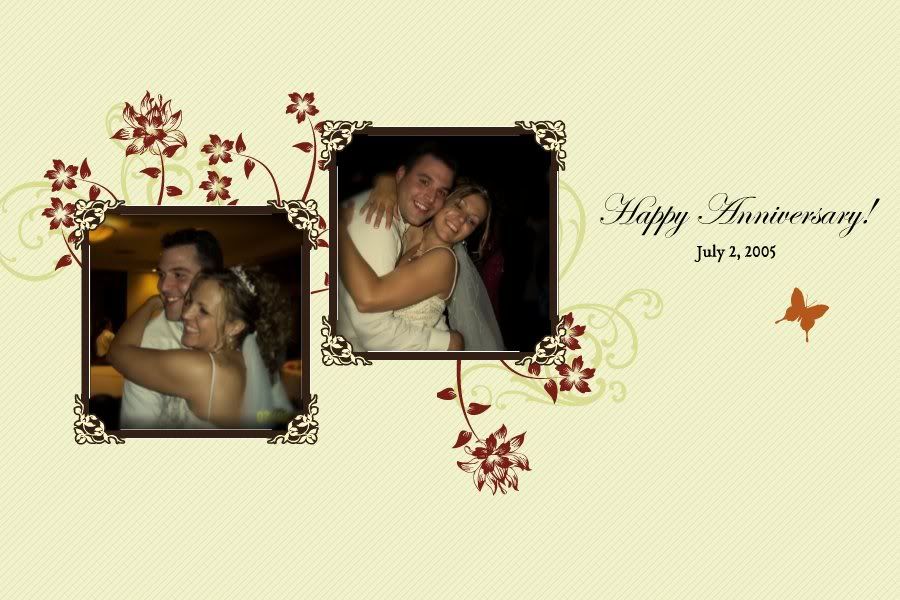
I am excited to announce that Piece of Cake Decorating is now selling edible cake images. All images are printed on an 8x10 icing sheet. You can purchase an image(8x10 or smaller) for $10 or a personalized collage similar to the picture shown for $15. The collages can have up to three photos and will be designed especially for you. Shipping on any image is $5 and will be sent USPS Priority Mail.

As always, all purchases are done through PayPal. Once you have purchased an image, please e-mail your photos to kseals@pieceofcakedecorating.com along with the size and shape of your photo. If you are ordering a personalized collage, please enter any important details in the notes to seller.

Click to purchase from my sister site, www.KimsCake.com.


Just a few examples of our collages. You are not limited to what you see.

Edible Father's Day CollageEdible Anniversary CollageEdible Music Collage
Read more »

In Labels: , , , , on .

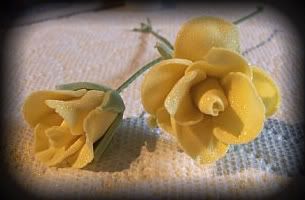
This edible glitter is used in cake decorating to make your decorations stand out. If you look at the before and after pictures below, you can easily see that luster dust gives your cake decorations that extra pop. Wilton calls it Pearl Dust while other companies call it Luster Dust. It can be found at most craft stores or you can purchase it right now from Amazon.com (look below the pictures for a link). Just use the arrows to rotate the carousel and click on the color of your choice. We also sell a variety of gum paste flowers just like these. Click here to purchase.


Gumpaste Roses Before Gumpaste Roses After


Read more »

In Labels: , , , , on .

Last week I posted about Unique Cake Decorating Items on Etsy.com. One of these items was a cake topper that used beads. Today I came across a blog post (August Birthstones-Peridot, Sardonyx, Carnelian) by Silver Rose Blogs and came up with a new cake idea using birthstones and beads.

Sometimes it can be difficult coming up with ideas for a birthday cake. Especially when a person's interests are not easily transferred into cake. When you need to make a birthday cake but don't have any ideas or inspirations, make a birthstone cake.

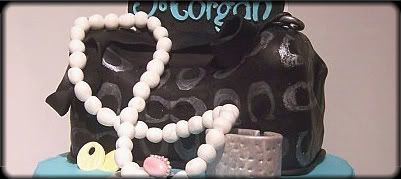
Beads can be used many different ways on a cake. They can be strung on a string, then wrapped around the bottom as a boarder and strung on wire to be used as a cake topper or placed all around the cake so the cascade down the sides.

If you do not want to use real beads, you can also purchase or make edible beads in the color of your choice. To make your own, all you need is a mold like the ones listed below and dyed gumpaste.


If you want to know more about birthstones, check out Silver Rose Blogs for more information.
Read more »

In Labels: , , , , , , , , , on .


Cake dowels are needed to give support to a cake. Without them, a stacked cake can fall or the filling will ooze out the sides when the cake settles. Your dowels can be made of wood or plastic and they are easy to put in a cake. Just follow these step...

  1. Place the first tier on your cake board. You will probably need 4-5 dowels for this layer (more dowels will be needed if you cake is more than 3 tiers high) and they will be placed in a circle around the center of the cake. Take one dowel and place it in the cake. Measure the height and mark it with a marker. Remove the dowel and cut to size. Wooden dowels cut best with a hedge trimmer but a bread knife will also work. A knife is the easiest way to cut a plastic dowel. Place the cut dowel back in the cake and repeat these steps for the remaining dowel in this tier.
  2. Place the next tier on top. With each tier, you will need less dowels. The wooden dowels for this tier will need to be sharpened with a pencil sharpener so that they go through the cardboard divider. Repeat the steps above but use a hammer to drive the wooden dowel to the bottom cake board. If using plastic dowels, you will not be able to go to the bottom of the cake. You can also choose not to sharpen and hammer the wooden dowel but it will not be as stable.
  3. Keep repeating these steps until you get to the top tier. Once you are on the top tier, sharpen your wooden dowel and hammer it down the center of your cake, all the way to the bottom cake board. This is an important step because it will keep your cake from tipping over.

A few extra notes about dowels...

  • You will need fewer dowels if you are using plastic.
  • If you choose to sharpen and hammer the dowels for each of the higher tiers, make sure you place them in a way that they will not hit the dowels below them.
  • If you are still confused, check out this video tutorial on How to Stacking Cakes.
Read more »

In Labels: , , , , , , , , , on .

Many people do not know about this great site, Etsy.com. There, you can find so many unique handmade items for any occasion. When it comes to cake decorating, you will find cake toppers, gum paste flower sprays, and other cake accessories.


While you are there, check out some of the great jewelry by Red Seals Handmade Jewelry and Watches and my new favorite, Kandio Designs. She also has a great blog for the creative mind by the same name. Stop by the Kandio Designs blog for some great inspiration.
Read more »

In Labels: , , , , , , , , , on .