Solution Graphics

Foodbuzz
Ask an Expert - Visit my Virtual Office at LivePerson
Showing posts with label Icing Tricks of the Trade. Show all posts
Red Devil 4714 4-Inch Plastic Putty Knife


Wow, it has been way to long since I've posted.  My friends and family have been keeping me busy with cake orders.  That means new cake guides will be coming soon!  For now, I want to share with you my newest, old cake decorating trick.  Yes you read that correctly :)  For years cake decorators have been icing their cakes with Spackle or putty knives.  It was only recently that I started doing this myself.  The results are amazing.
Just see for yourself...


The buttercream covered bottom tier here was iced used an angled spatula.  It is pretty smooth but you can tell it is definitely buttercream icing.


In this second version of the cake I used the Spackle knife...


As you can see, it is much smoother than the first picture.

To use the Spackle knife I first place the icing on the cake with a large piping bag and large flat tip (ie Wilton tip #182).  Once the cake is covered, I smooth it out with an angled spatula.  To get it "perfectly" smooth I then grab my Spackle knife and go over the cake one last time.  Use light pressure so you don't take too much icing off the cake.

Read more »

In Labels: , , on .


Well it probably isn't a new trick but it definitely new to me and I feel silly for not thinking of this sooner.  If you've ever stacked buttercream covered cakes like the one here, you know how easy it is to put fingerprints and smudges in your beautifully iced cake.  After years of this issue, it finally occurred to me that frozen buttercream smudges a whole lot less then chilled or room temperature buttercream.  I mean think about it, isn't that the whole idea behind the frozen buttercream transfer?

I start by icing the upper tiers first.  If we call the bottom tier, tier 1, I will cover tiers 2, 3, 4...etc. in that order.  As each tier is covered I place it in the freezer.  Once all the tiers are freezing I ice the bottom tier, dowel it and start stacking.  The cakes have only been in the freezer long enough to harden the icing for a moment so you will need to work fast.  And this doesn't mean you can hold the cake like you would a fondant covered cake because your warm hands will leave some kind of mark but, if you do need to touch the cake you won't leave a huge hole in your icing. 

Here are some other links to help you stack a cake...

Video Tutorial: Stacking Cakes
Video Tutorial: Using Dowels
Recipe: Buttercream Icing
Tutorial: Icing a Cake w/the Viva Paper Towel Method
Read more »

In Labels: , on .

Marshmallow fondant (MMF) is easy to make but can be tricky to work with when used for more than covering cakes.  As you may know, you can put your MMF in the microwave for a few seconds if it is too hard to knead.  This is an easy fix to the problem but, after it is rolled out it will stretch and change shape easily...not ideal for decorating.  To combat this problem I simply let the fondant sit for a few minutes after it is rolled out.  Once it cools down, it is less likely to stretch.  I also try to microwave the MMF just long enough to make it workable.  I let the kneading soften it further so that it is ready to decorate with from the start.
Read more »

In Labels: , , , on .


Today's post is inspired by a reader's question. She asked me for advice on working with fondant.  It can seem tricky if you aren't used to the nature of the product.  In fact, I started working on my own with fondant but never could get it quite right until I took a class and learned a few tricks that I wouldn't have figured out otherwise.  Here are a few important tips to help get you started.


  1. Kneed the fondant until it is pliable like taffy.  If the fondant is too dry then it won't lay right on the cake.  This was my biggest problem when I started.
  2. Make sure your surface is well covered with powdered sugar and your hands are greased with Crisco or vegetable shortening.  A fondant mat is probably a good purchase because most counter surfaces will suck the moisture out of your fondant (another problem I encountered).
  3. Fondant dries up quickly so make sure any fondant you are not using is in an air tight container AND covered in plastic wrap.

The fondant mat I just mentioned and a fondant rolling pin are great purchases.  A wooden rolling pin will suck the moisture out of your fondant so don't use that. A fondant smoother (pictured below) is also helpful in getting your fondant to lay smooth on your cake.  Just make sure it is dusted with powdered sugar or corn starch.


Buying fondant can be a bit pricey when you are starting out, that is why I use marshmallow fondant.  It is easy and cheap to make plus it tastes great! But, if you don't always have time to make your fondant, Satin Ice Fondant is a great choice.


Finally, try not to roll your fondant out too thin.  The thinner the fondant, the more imperfections you will see.  That is also why it is important to ice your cake as smooth as possible before you apply your fondant.  Once your cake is iced, let the icing crust up a bit then apply a small layer of piping gel around the bottom of your cake.  This will help the fondant to stick.  It has also been my experience that fondant on top of crusted icing gives it a cleaner look and a sharper edge.

Remember, practice makes perfect so don't give up if you have trouble the first few times.  You'll get it eventually.  If you have any other questions regarding this topic, please e-mail them to kseals@pieceofcakedecorating.com and you will get a response within 24 hours.   Your questions will also help other readers as I will continue to add to this post as they come in.


Gumpaste is very similar but it dries MUCH faster.  I am still learning the ins and outs of gumpaste, especially when it comes to making characters.  The gumpaste tricks I have been learning will be coming soon to PCD.
Read more »

In Labels: , , on .

Making icing and fondant is an extremely messy job.  It is impossible to have a spotless kitchen after a job like that but there are a few tricks I have come up with to minimize the mess when making fondant.

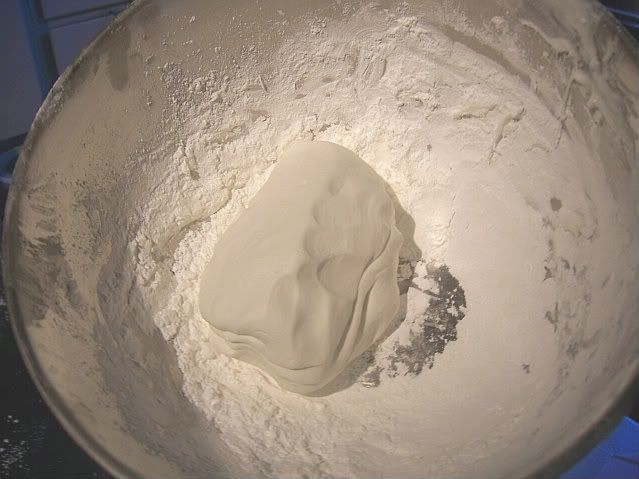
  • Work in a large bowl so you can keep the sugar off the counter.  As you can see in the picture above, I kept the fondant in the bowl until the very end.  I only kneed my dough on the counter when I do not want to add anymore sugar.
  • Before you even touch the fondant, rub vegetable shortening on your hands.  By making them greasy, the fondant will not stick to you...AT ALL!  If it does then you need more shortening.
  • If you have an electric mixer, you can use your dough hook to make the fondant.  Just be careful to mix extremely slowly in the beginning otherwise, you will have a bigger mess then you can imagine.
  • If you decide to use the mixer then grease the bowl first.  Cleanup will go much faster.
Read more »

In Labels: , , on .


When decorating a cake you need to be careful with your icing.  If you let it sit out while decorating, it will crust up and become unusable.  Simply cover your icing with a wet paper towel to prevent this from happening.  It is an easy way to keep moisture in your icing. 
Read more »

In Labels: , on .

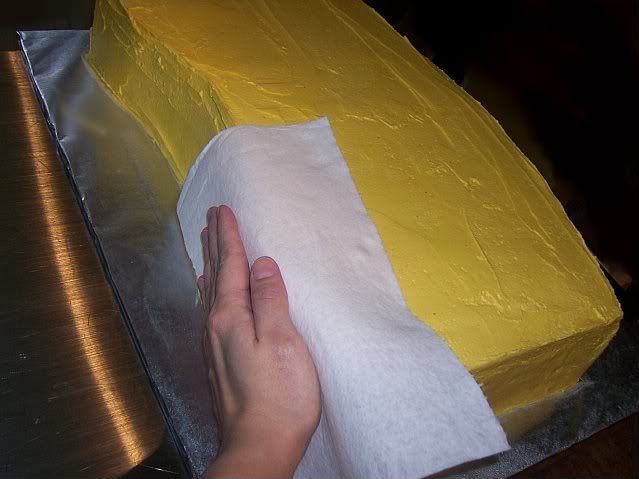
Since I began decorating cakes I have heard about the "Viva Paper Towel Method"  but have never tried it until now.  Basically, Viva Paper Towels are made without design so when pressed on an iced cake, the buttercream smooths out.  In two easy steps, you can have a smooth, professional looking cake.


Step 1

Ice your cake as you normally would but this time, allow the buttercream icing to crust up.  It is hard to judge how long this will take but it is an important step.  Here I played it safe and let my iced cake sit over night.


Step 2


Once your buttercream has crusted, there are two ways you can use the paper towel to smooth your icing. The first uses your fondant smoother (left picture).  I like this tool because it keeps the surface flat.  The second method uses your hand (right picture).  This is a little tricky because you need to be sure to keep your hand and fingers flat and apply equal pressure but the natural warmth of your hand helps.  Both methods work so it is simply a matter of preference.


In this picture I have used the Viva Paper Towel on the right side of the cake.  It is easy to see that the icing is much smoother.


Once you are done, your finished cake should look something like this...

Read more »

In Labels: , , , , on .