Solution Graphics

Foodbuzz
Ask an Expert - Visit my Virtual Office at LivePerson
Showing posts with label Halloween. Show all posts


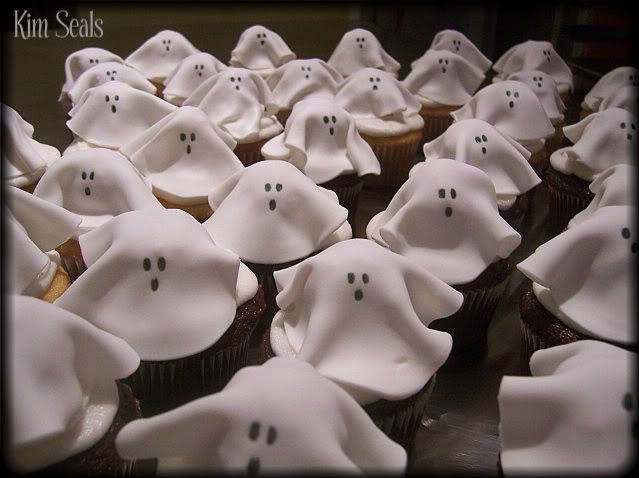
Here is an extremely easy but very cute cupcake idea for any of your child's parties this Halloween.  Make it even more fun and decorate with your son or daughter!  I made these with my son and he was so proud to share these with his class.

Supplies

Cupcakes
Buttercream Icing
Doughnut Holes (Munchkins)
White Fondant
Black Edible Ink Marker


Directions

Step 1


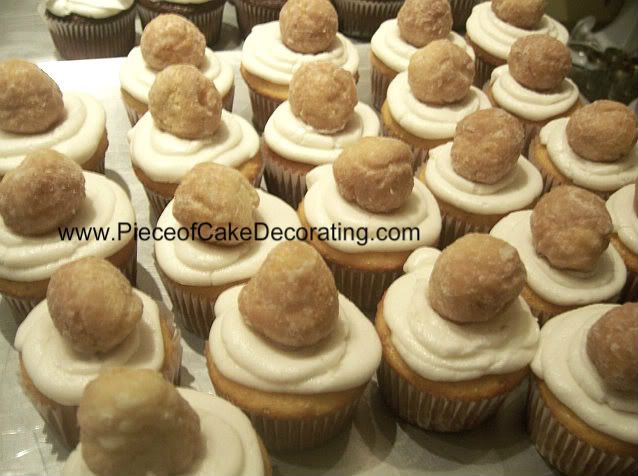
Bake your cupcakes and ice them any way you wish.  I used a large round tip and made a swirl design in case you were able to see the icing under the ghost.  Next, place a doughnut hole on each cupcake.

Step 2


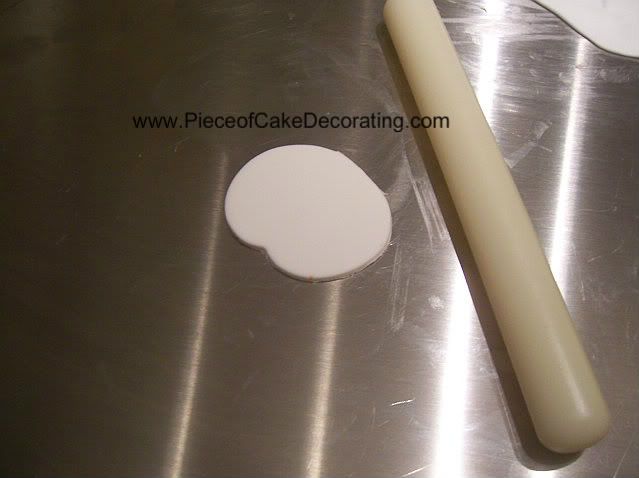
Roll out your fondant and cut out a large circle.  I didn't have a circle large enough so I used my pumpkin cutter and cut off the stem.  It doesn't really matter.  It is the size you want, not the shape.  Then, roll the "circle" out thin enough and large enough to fit over the doughnut hole.  Just make sure it isn't so thin that you see the doughnut underneath.

Step 3

Place your rolled out "circle" on top of your doughnut hole and use the black edible ink marker to draw a ghost face.

That's it!
Read more »

In Labels: , , , , , on .


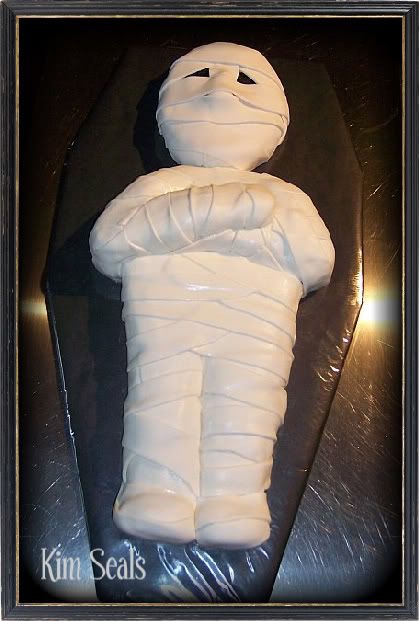
My passion for cake decorating started with a simple Halloween Jack-o-Lantern cake for a friends costume party so I always get excited when this time of year rolls around.  This mummy cake was made for last year's party and it was a huge hit.

In this guide you will learn how to carve a cake to look like a mummy as well as how to wrap your mummy cake with fondant strips.

To make this cake you will need...

Foam-Core board
Wilton Fanci-Foil or black wrapping paper and clear cellophane
1 oval cake
1 13x9 cake
1-2 mini wonder mold cakes
2 batches of buttercream icing
3 batches of fondant
Wilton's Fondant Ribbon Cutter (optional)
black buttercream icing
any round tip


Directions:

Step 1

Cut a piece of Foam-Core in the shape of a coffin to create your cake board.  Then, either cover it with Wilton Fanci Foil or black wrapping paper.   If you use black wrapping paper you will then need to cover the board again with clear cellophane.

Step 2

There is no need to level, tort, and fill any of these cakes.  In fact, you will make your job easier if you don't.  So, your next step is to cut the 13x9 cake into the shape of the body.

***Decorator's Tip*** A paper template will help make sure your body is symmetrical and make carving so much easier.

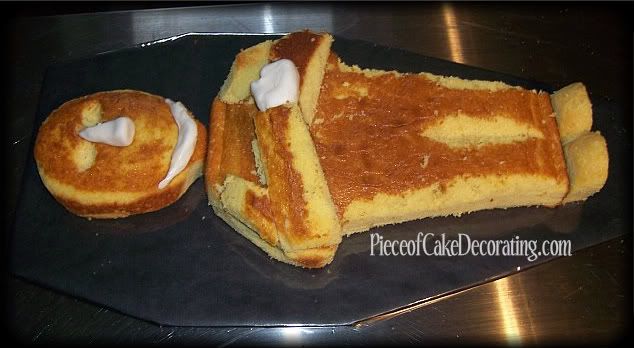
As you can see from this picture, I rounded the edges a bit, cut a slit for the legs and used the extra pieces to shape the arms and shoulders. (Don't worry about the hands just yet.)

***Decorator's Tip*** Cut your cake frozen to reduce the amount of crumbs and get more control over the amount of cake you are carving off. 

Next, round off the edges of the oval cake to create the head and trim some cake off one end to make a neck. (Don't worry about the nose and chin just yet.)  Then, using a small spoon, scoop out indents for the eye sockets.  Depending how your cake baked, you may need to carve off a little cake to create cheek bones.  I did not have to here.

Finally, depending on the size of your legs, cut a mini wonder mold cake in half and trim a bit off the edges to create the feet.  If your legs come out larger than mine, you may need to use 2 mini cakes (1 per foot) to keep things proportional.


Step 3

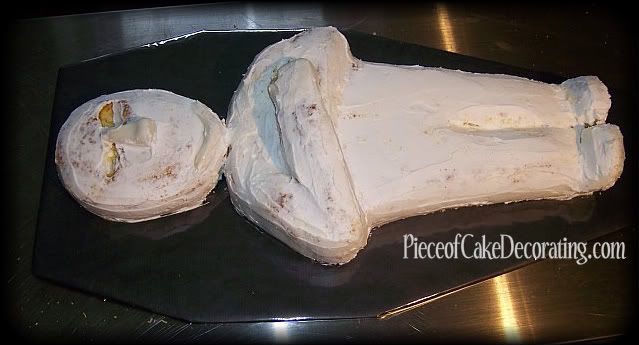
Using the picture above as a guide and your carved cakes for proportions, make a nose, chin, and hand out of fondant or gumpaste and attach it to the face with a small amount of buttercream.


Step 4


Cover your entire cake and fondant features with buttercream icing.  Then, fill in the eyes with black icing and a round tip.


Step 5

Roll out your fondant between 1/8 and 1/4 inch thickness and cut into long strips.  Wilton's Fondant Ribbon Cutter will make this job very easy.


Step 6

Wrap the mummy with your strips of fondant making sure not to leave any cake showing.  Tuck the edges of your fondant strips under the cake with a gumpaste tool, decorator's brush, or fork.

***Decorator's Tip*** To help accent the slit cut for the legs, wrap each leg individually with shorter strips.


Reader photos using this guide...

  Jacob


Lucy
Read more »

In Labels: , , , on .

 New Halloween cake ideas are coming soon to PCD.  In the mean time, enjoy this guest post.

Guest post written by Miriam Davidson

It's barely September, but I'm already looking at patterns for Halloween costumes. But they're not for me. My grandson has insisted that I make a costume for him and luckily he made this request pretty early so I'm actually able to do it.

I always made my kids' Halloween and school play costumes when they were growing up but it has been so long since I've made one because they outgrew the age where they needed costumes like that a long, long time ago.

What he wants to be is also something that I think it might be hard to find in stores anyway. He watched the movie "Where the Wild Things Are" and loved it. He wants to be one of the wild things on there so the costume will be a little more complicated than if he was the main character that just wears a little furry wolf costume. But I almost started making him a costume for the wrong wild thing, which would have been a disaster if his mom hadn't caught it. I misheard him and after that I looked up miracle ear locations and made an appointment to get hearing aids.

I got some and rewatched the movie with my grandson. It was really interesting to see how they developed the characters when they didn't have a whole lot to go from from the book, which barely has many words in it.
Read more »

In Labels: , on .

Wilton Haunted House Cake

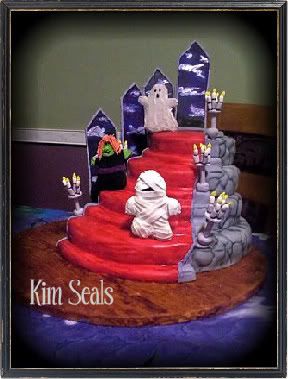
Here is one more Halloween cake. I got this haunted house idea from an old Wilton Yearbook. I could not find the directions on their website for you but basically it is a 3 tier cake where the tiers are lined up towards the back. To get the stone look I covered the cakes in gray fondant and using a gumpaste tool, I indented the fondant to look like stone. To give the stone a more realistic look, I brushed black coloring into the cracks. Also, the cake board was covered in brown fondant. After the board was covered, I used a gumpaste tool to make each board and add a woodgrain effect. Finally, I painted it with brown coloring to give it the glossy finish.

***Decorator's Tip*** After you paint a small section of the wood floor, run your finger through the paint. This will push the color into the cracks and give it a more realistic look. It is a messy technique but definitely worth it.

The steps were made with red fondant. The extra steps were made with a rectangular piece of fondant before it was covered in red. The candles were made of gumpaste, Tic-Tacs, and royal icing. Finally, the windows were made from Wilton Color Flow while the people where made with cookies and royal icing. If you would like more help with this cake don't hesitate to e-mail (kseals@pieceofcakedecorating.com) your questions or ask in our forums.

This cake is a lot of work but definitely worth the wow factor. Here is the cake I am making this year. Much simpler but very creepy. You can find instructions to this cake on Wilton's website.
Read more »

In Labels: , , , , , , , , on .

Jack-o-lantern Cake


Here is a super easy Halloween Pumpkin cake. In this guide you will learn how to stack the cakes and decorate in order to recreate this Jack-o-lantern. If you are looking to challenge yourself, cover the cake in orange fondant.

To make this cake you will need...

2 cakes baked in a bunt pan
Orange, green and black buttercream icing
Small paper or plastic cup
Round cake board


Directions

Step 1

Make sure the tops and the bottoms of the cakes are flat so the cake doesn't tip when it is decorated. Place the cakes on the cake board then fill and cover with orange buttercream icing.

***Decorator's Tip***
Place the bottom cake on the cake board so the smaller part is down and the larger part is up. The top cake has the large part on the bottom and the small part facing up. There is really only 1 way to do this so the cake looks like a pumpkin.

Step 2

Cover the small cup with green buttercream icing and place on top of the cake.


Step 3

Using black buttercream icing (or a tube of black) and tip # 3 or 4, pipe the face.

***Decorator's Tip***
If you don't trust yourself piping free hand, first draw the face with a toothpick.

That's it, 3 simple steps and you have a Jack-o-Lantern Cake. Now that you have extra time on your hands, you should check out a great blog for the crafter at heart. Destination Handmade has a little bit for everyone.
Read more »

In Labels: , , , , , , , , , , on .

Vampire Cake

In this guide you will be given step-by-step instructions on how to decorate this cute vampire cake.

I know it seems early but Halloween will be here before you know it. If you are planning a party this year, don't forget the cake! Between HBO's True Blood and the Twilight series, Vampires are all the rage right now. Here is an easy vampire cake that just about anyone can do.

To make this cake you will need...

2 10 inch round cakes
Green, black, yellow/gold and white buttercream icing
4 Tips # 5

Recommended products: It is very difficult to make true black. When I only need a small amount like this, I always buy pre-made black icing.


***Decorator's tip*** If you do not have four #5 tips, do not worry. You will get the same effect using tips #4 or 6. If you do not want to use a tip at all, just cut the end of the piping bag to size. It will work just as well but your lines will not be as tight. This techniques works best for piping the eyes and nose because of their shape.


Directions:


Step 1

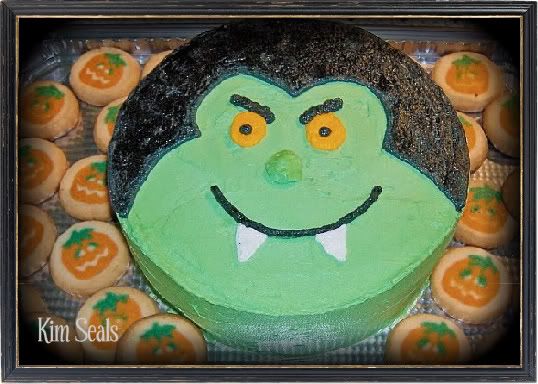
Level, tort and fill the cakes. They can be placed on a 12 or 14 inch cake board. In this picture, the cake is placed on a large cake board with Pillsbury Pumpkin Sugar Cookies scattered around for added decoration. Ice the cake with your green buttercream icing.


Step 2

Using a toothpick, outline the vampire's hair. Next, using tip #5 and black buttercream icing, pipe the outline of the hair and fill in with tight lines.


***Decorator's Tip*** To smooth out the striped effect you get from filling in an outline using a piping bag, simply put a little cornstarch on your finger and gently pat it flat. Most of the cornstarch will fade into the icing but the excess can be brushed away with a decorating brush.


Publish Post

Step 3

Using tip # 5 and yellow icing, pipe the eyes on the cake. Add the pupils using the extra black icing.


Step 4

Using tip # 5 and green icing, pipe the nose. Next, add the mouth and eyebrows with the left over black icing and the teeth (tip #5) with white icing.
Read more »

In Labels: , , , , , , , , , , , on .